PiZero Clock Radio – Part 1
Long story short; I have a clock radio and it can just about play something from the radio and wake me up in the morning. But if the power goes out it never remembers the time or what any of the radio stations were, and it completely lacks the ability to auto-seek for stations (and I can never remember what the stations numbers are either which is why only one is ever reprogrammed in). As a result, I’ve had it in the back of my mind to build a replacement using my Pi Zero and now that I have a couple extra bits of hardware I thought I’d make a stab at starting the build.
So this is part one of the build process. Or, as I like to title it; Part “I’ve just got some neat hardware so let’s muck about and see if I can get it to do anything”.
The plan
So the plan is obvious; build a clock radio. The things I would like this clock radio to eventually be able to do are:
- Show the time
- Be able to set one or more alarms that can function on different day/time schedules and have the alarm be a sound or music
- Hook up to internet radio stations and be able to save favourite stations
- Play MP3s either from the sdcard or network
- Show the current weather and forcast
- Show calendar
- Show news stream
- Possibly stream tv/movies from networked HTPC
- All be driven from an easy to use, finger (and “I’ve just woken up in the morning blurry eyed”) friendly interface
So lots to do, but the first stage is just to assemble the core hardware and see if I can get it to play nicely together.
 The hardware

There are a number of things that I needed to kick start this project:
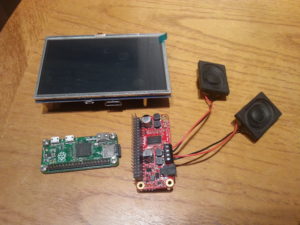
- Raspberry Pi Zero
For this I’m using a rev 1.2 pi I purchased a while ago (as part of the Mega 8GB WiFi Pack from The Pi Hut) - A screen
There are many different types of screen out there – the official pi one would have been nice – but I didn’t want to spend a lot of money. I think I got a fairly nice trade-off by buying a 5″ resistive touch screen (a good enough size I can see things on even if I need to stab at it a bit harder with my finger). I purchased an XPT2046, 5″ HDMI display (800×480) from eBay. (That may not be the exact seller used, but shop around – you will probably find it cheaper.) - Some kind of audio output
This is really a major part for me; if it’s can’t make noise – or a loud enough noise to wake me – then I’m never going to get up for work! I wanted something nice and easy to fit together that could output to speakers. For that I chose the JustBoom Amp Zero pHAT, purchased from Pi Supply. - Speakers
For these I just ripper a couple out of an old, knackered monitor that was destined for waste recycling. They’re small 8Ω/2W speakers but would really do the trick because they’re not physically very large, so perfect for the clock radio, and they were free – perfect for my wallet. - Extra bits
I wanted to stack my Pi Zero, Amp and 5″ screen, but the standard headers you tend to get with the Pi only allow for one card. So I bought a couple each of the 14.83mm and 10mm 2×20 stacking headers from Toby Electronics. - A case
I’d love to say I have a 3D printer I can create a case with, or some really nice retro something-or-other that will serve well, but I don’t. I’ll probably end up making it out of some blocks/scraps of wood.
The software
- Standard Raspbian Jessie
There is a lot of media playing software out there which can be used with the amp; OSMC, Roon, Volumio, Moode, to name just a few. But whereas these would be great for playing media, these aren’t clock radios and wouldn’t offer me the kind of thing I want to do. So instead I am starting with a stock install of Raspbian Jessie and will attempt (sometime in the future) to build the interface myself. - Everything else
Not sure yet what I will need to use or be created. Chances are that the interface I will attempt to do myself (most likely to be web based, so probably a combination of Chromium in kiosk mode, nodejs, etc.) but then other parts will be standard software. For example, playing mp3s from the command line is quite easy with mpg321.
The mucking about bit
I’m not going to detail how you set up Raspbian on your sdcard – there are dozens of tutorials on how to do that. The only thing I will note is that getting everything working on the Pi Zero was far easier when having a Pi 2 (or, I guess, 3) hanging around. As you are no doubt aware, the Pi Zero is somewhat lacking on ports (what do you expect from a £4 machine!) so getting the wifi dongle set up, ssh and so on isn’t too easy unless you have a usb hub (which I didn’t). But because the Zero and Pi 2 are basically the same setup you can easily interchange sdcards. So I set everything up on my Pi 2, where I could plug in my wifi dongle, keyboard, output to a regular monitor and so on very easily because the ports are are there. Then when I put the sdcard back into the Pi Zero I knew I would be able to ssh or vnc into the machine and only then needed to plugin in the wifi dongle to the Pi Zero.
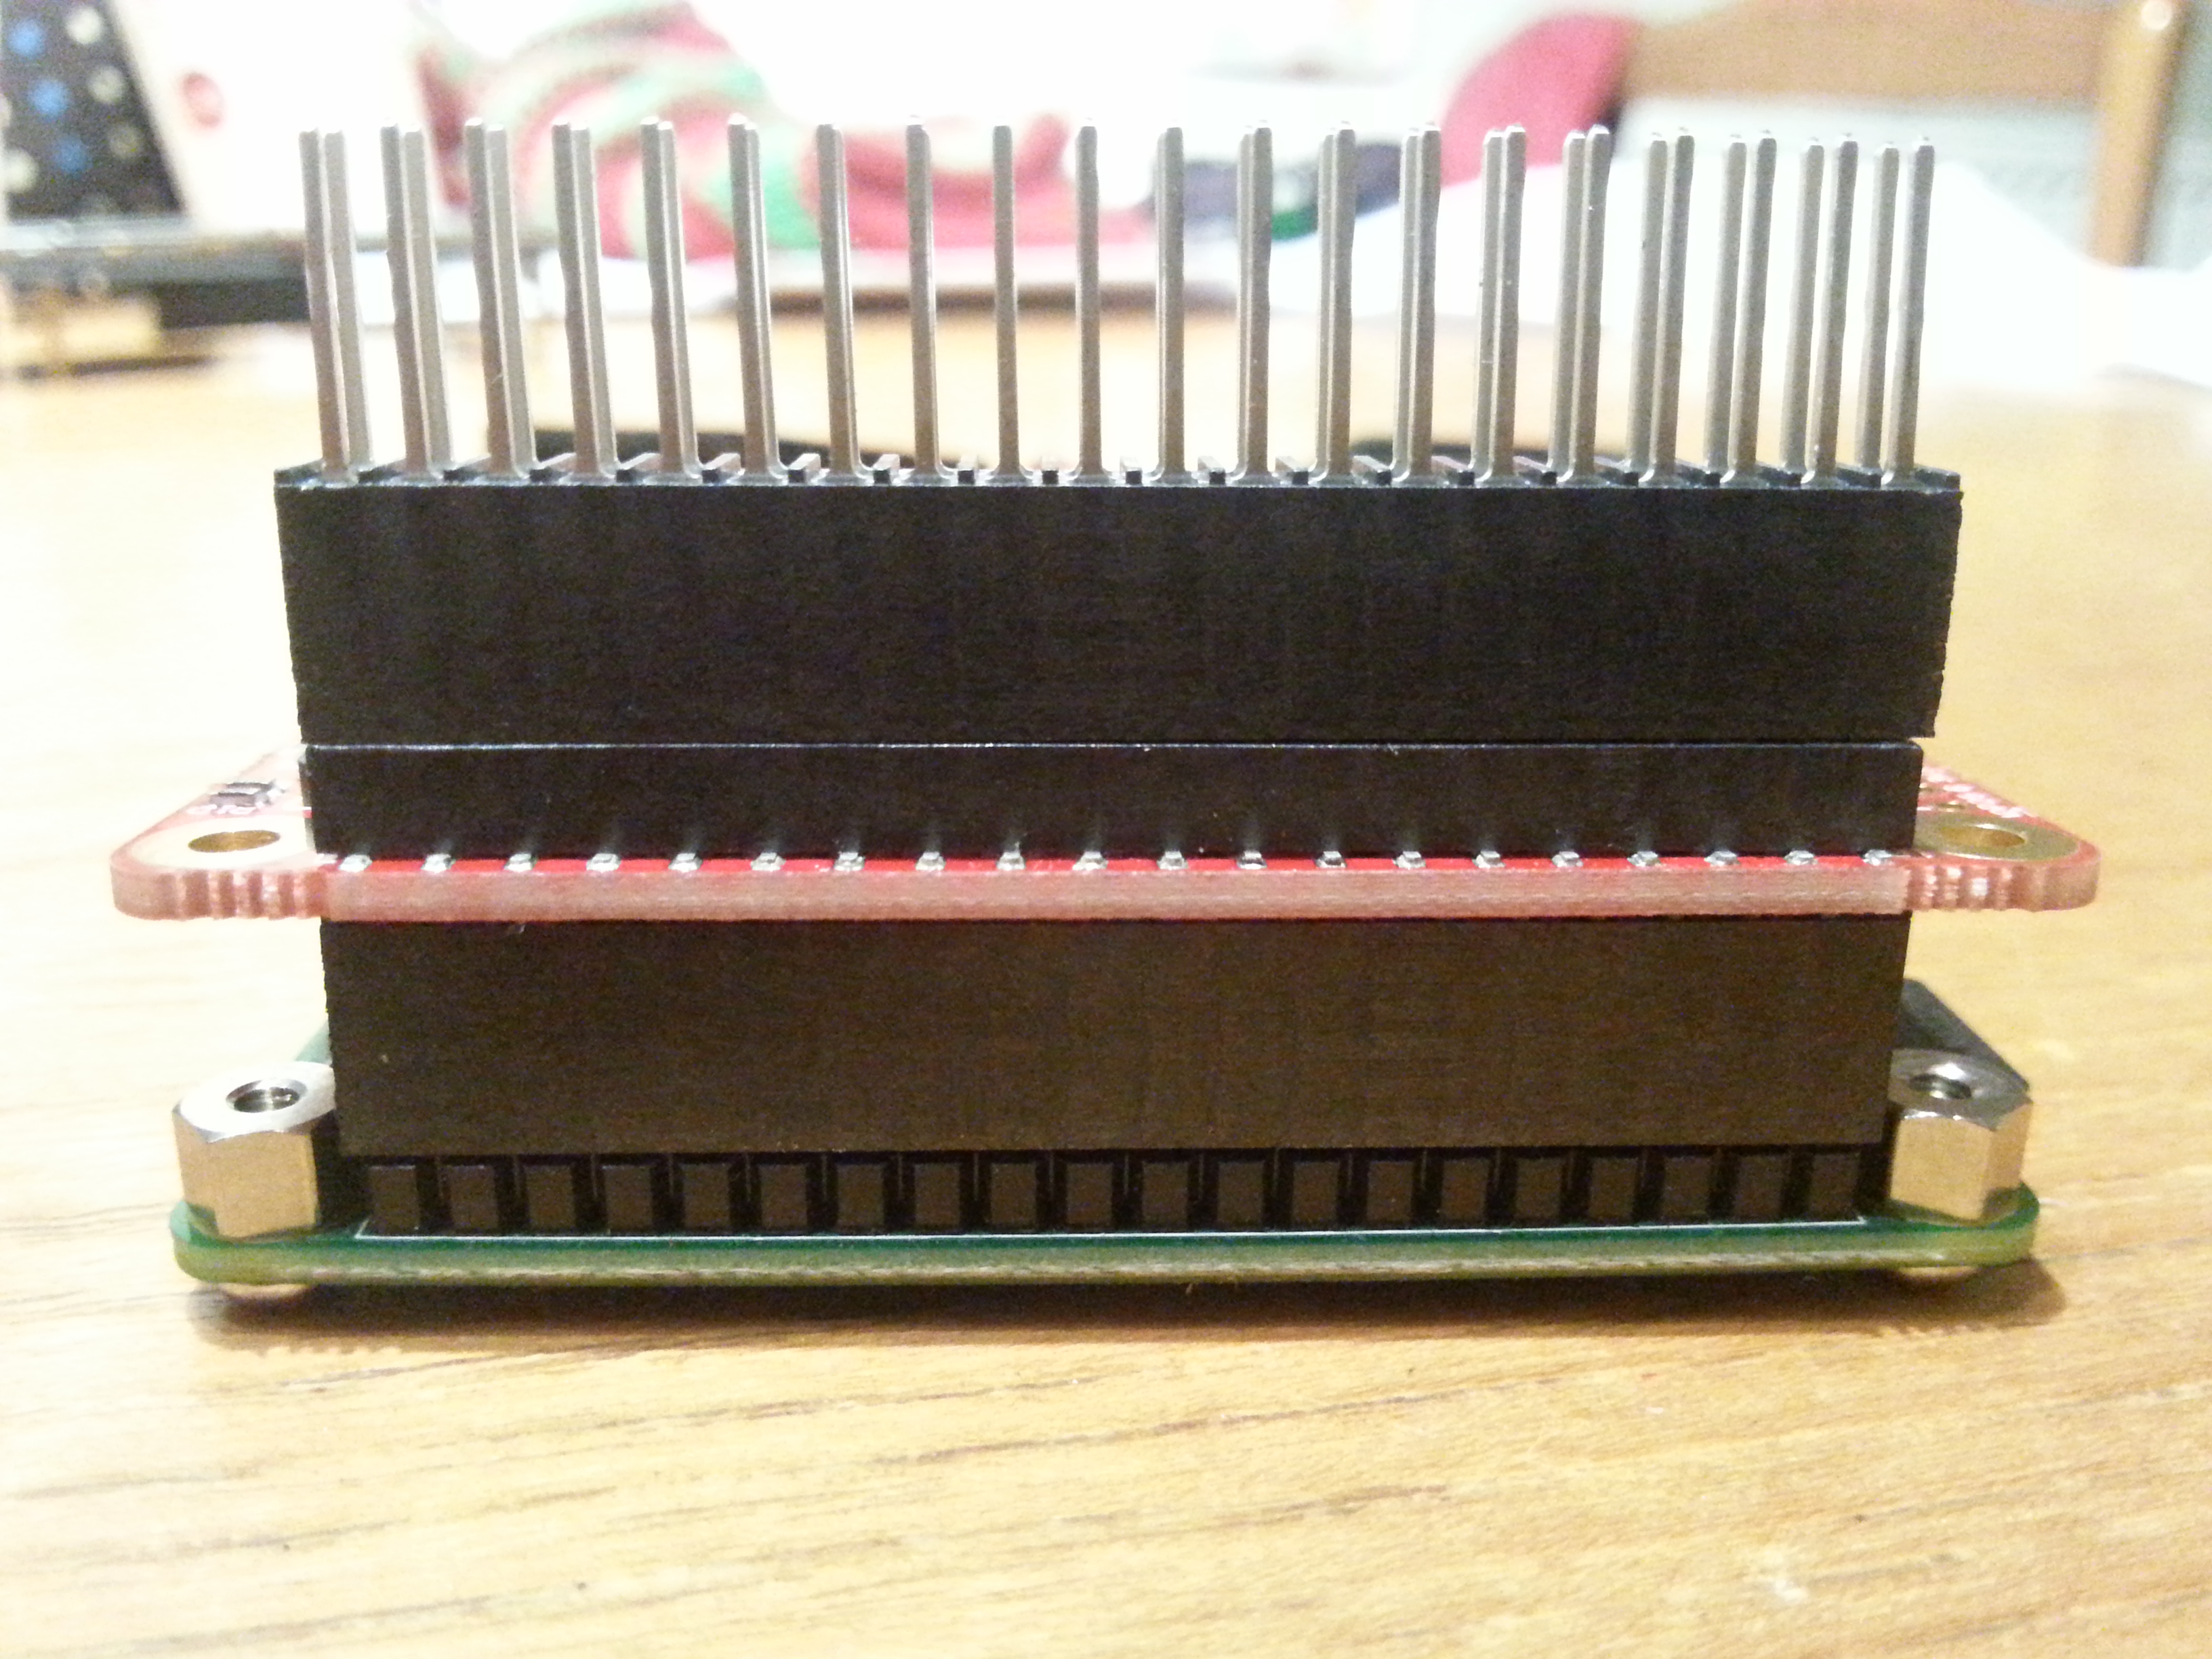 With that set up the first thing to do was test out the amp. For this I used one of the 10mm stacking headers on the bottom of the amp and then another on the top of the amp. I ended up not using the 14.83mm headers as they were just too long – even the 10mm header on the top ended up being a little too long when connecting the monitor. Once those connectors are in place it’s just a matter of putting it on the pin headers that are on the Pi Zero (well, they are once you’ve soldered some in place, that is!)
If, like me, you find yourself needing to take the boards apart and taking the headers off then be careful! The ones from Toby Electronics are well made with some very tight tolerances and I actually bent a couple of my header pins on the pi taking the stacking header off, so just watch out!
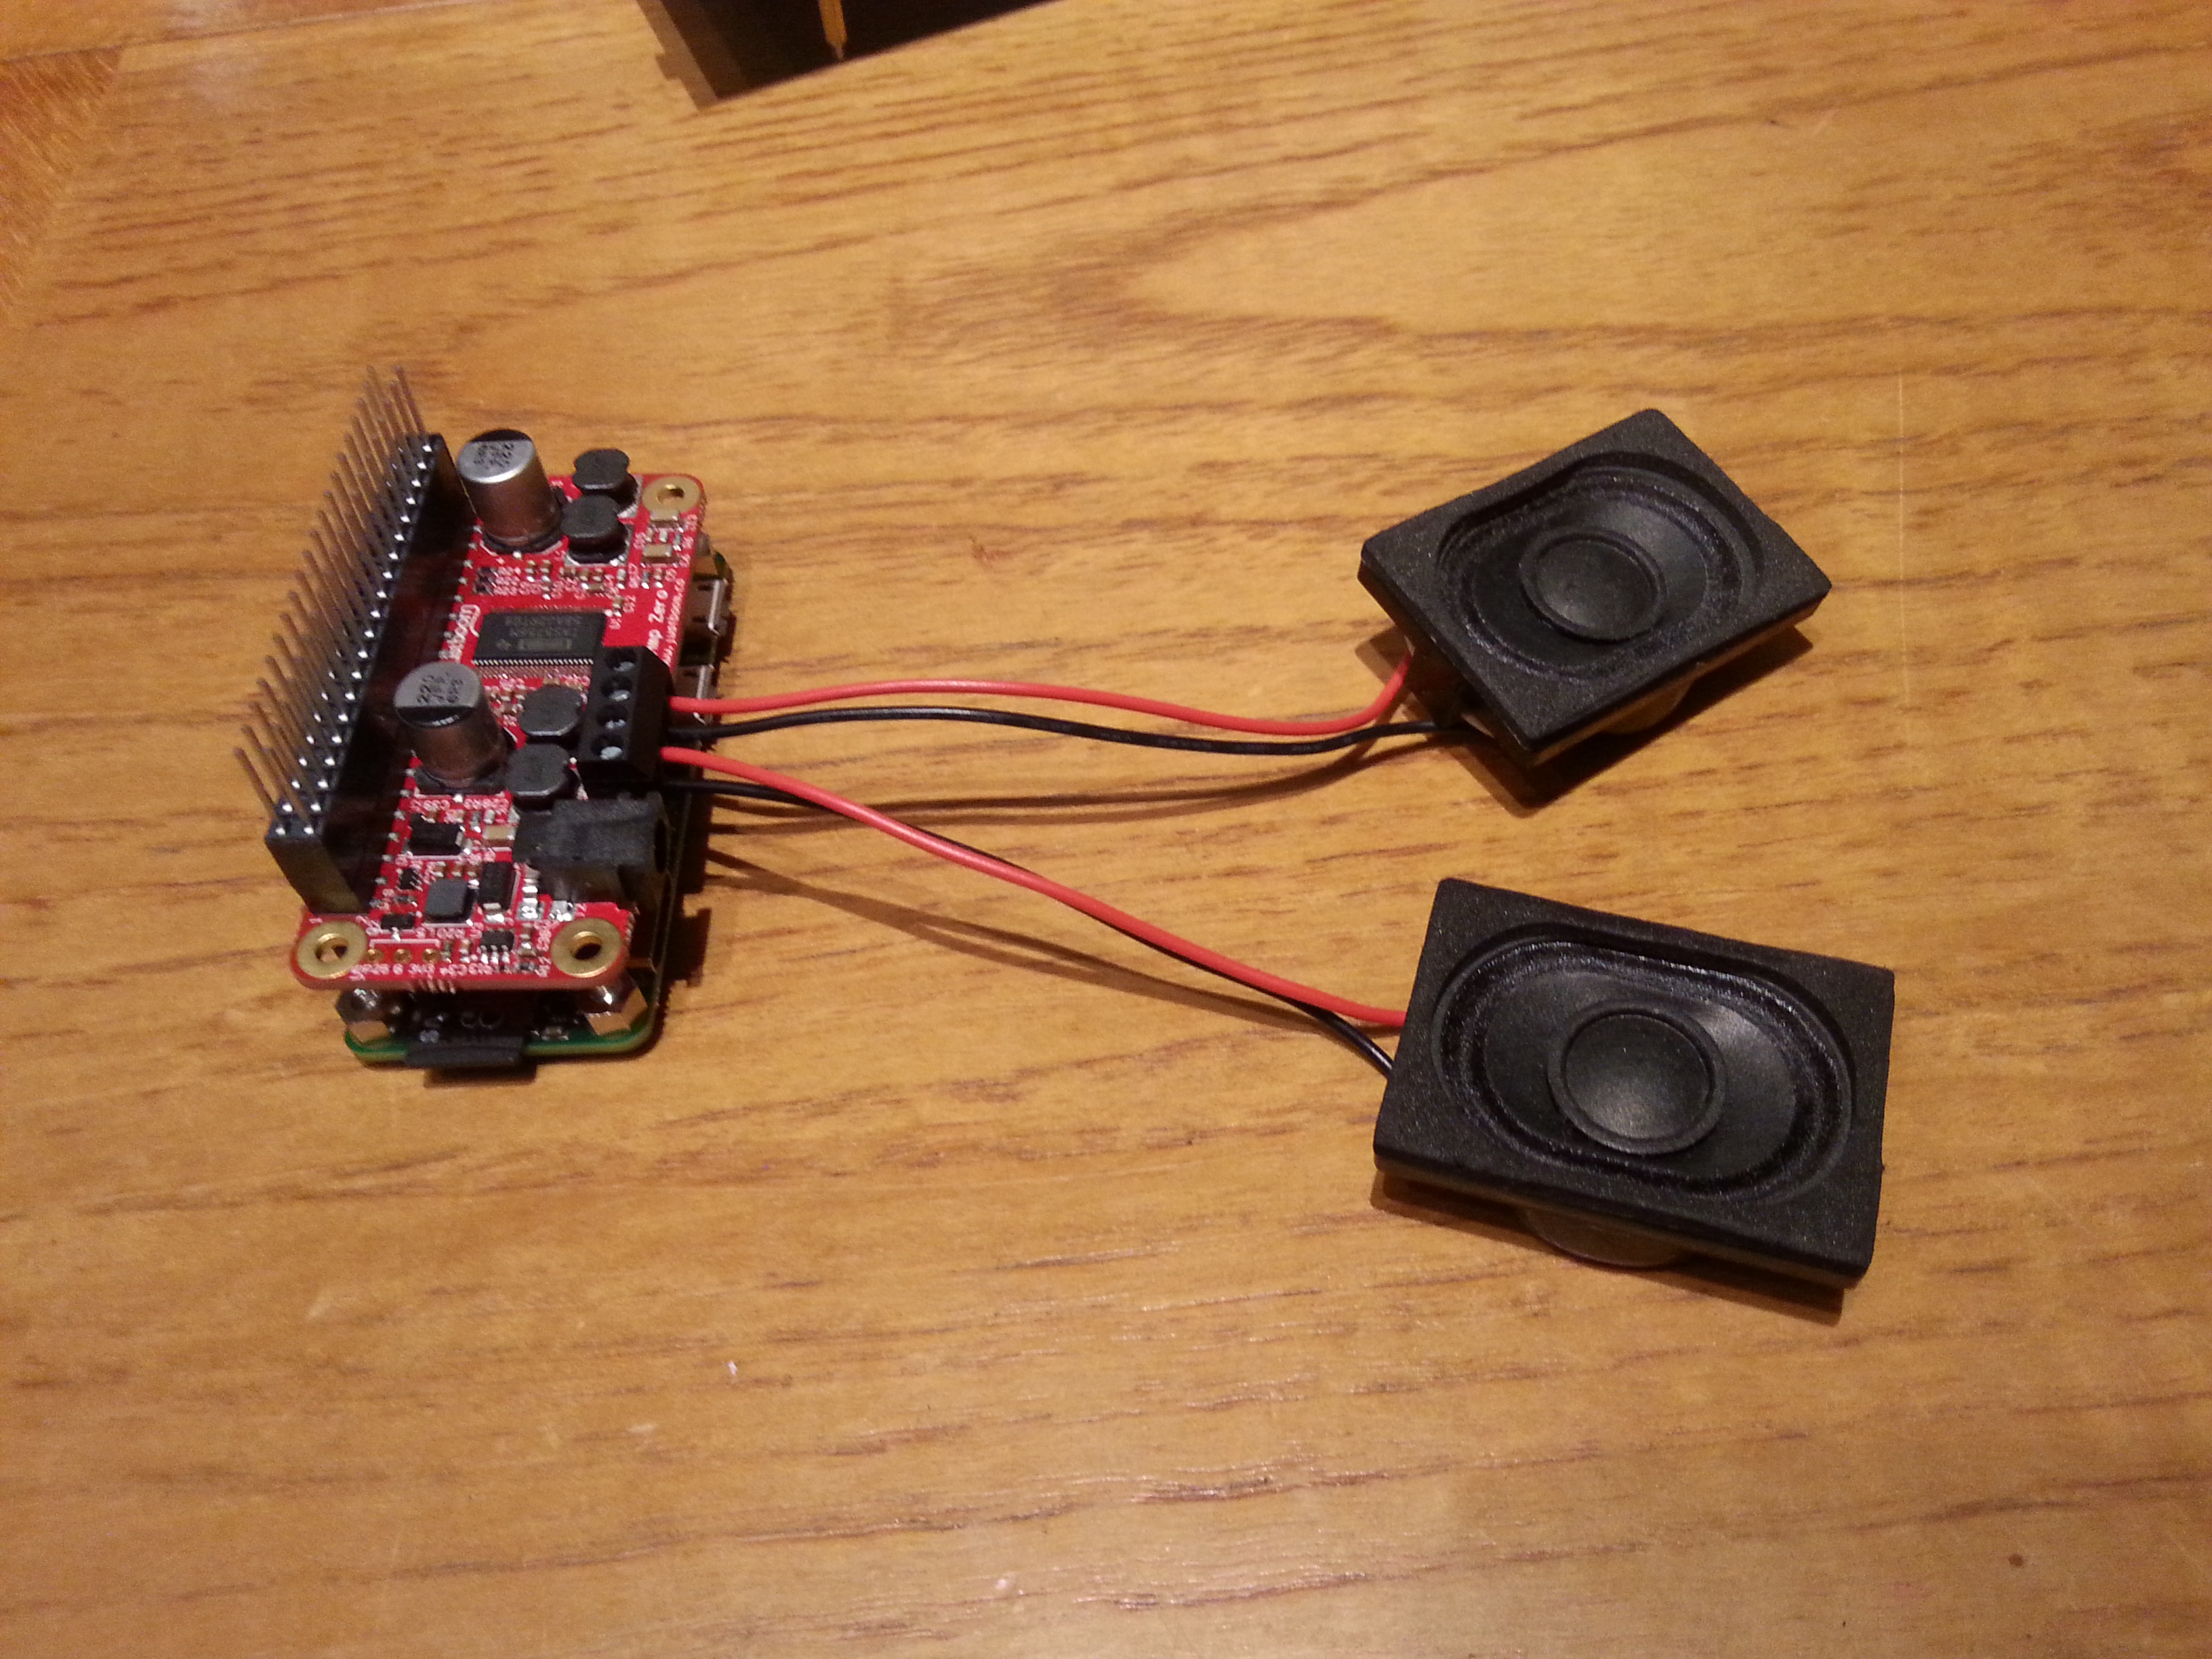 Once I connected the boards together I attached the speakers. You really can’t mess this bit up! Use the screw block terminals which are clearly marked with SPKR+/-
Setting up the amp
Almost everything you need to use the amp is already on Jessie. Because JustBoom have made their amp a fully compliant HAT board, it more or less is just a matter of plug and play – though you have to do a small config.txt file change.
The first thing I found I needed to do was disable the snd_bcm2835 audio. To do that, just place a comment in front of the line:
dtparam=audio=on
I personally just use this to edit the config file:
sudo nano /boot/config.txt
but you may like to use emacs, vim, or some graphical editor. Whatever floats your text editing boat.
Then it’s a matter of enabling the HAT board. This is done with using an overlay command in the config.txt file. Overlays are basically ways to describe add-on boards so that the system is aware of them and can add that information to the device tree. (You can read all about device trees and overlays on the Raspberry Pi website.) Thankfully Jessie already comes with a couple overlays for the JustBoom devices, one for their DACs (Digital to Analogue Converters) and what we’ll be using for the amp, and one for their digital devices.
So back in the config.txt file I added this line:
dtoverlay=justboom-dac
Also ensure that spi and i2c are enabled and just for good measure because I’m using a wifi dongle I make sure the usb port has max current set. In the end my dtparams and overlays in config.txt end up looking like:
dtparam=i2c_arm=on
dtparam=i2s=on
dtparam=spi=on
enable_uart=1
dtoverlay=justboom-dac
#dtparam=audio=on
max_usb_current=1
Testing the amp
Now the fun part – seeing if it all worked! At this point I gave the system a reboot and once back in I needed to make sure that the speakers could output some audio. For this I used the built-in speaker-test command.
speaker-test -c 2
The -c 2 is for the number of channels. Without supplying this I got no audio and an error message from speaker-test. But on a successful test I was able to hear a static sound for a second or two from one speaker and then the other, and back and forth it went.
By adjusting the speaker-text call a little to:
speaker-test -c 2 -t wav
it changes the type of output to a wav audio file. On running that command I heard “Front left” from the left speaker and “Front right” from the right speaker. Success! I have audio output!
Playing mp3s
The first thing I tried to use to play an mp3 was aplay but it did not go well at all! It turns out that aplay doesn’t support alsa audio devices which is just what the JustBoom Zero Amp pHAT device happens to be.
I ended up testing with mpg321 which can be easily installed via apt-get:
sudo apt-get update
sudo apt-get install mpg321
I copied an mp3 in the ~/Music/ directory of the Pi (you may choose to download something, copy it onto a usb stick or from the network, etc.) and then just ran the command:
mpg321 ~/Music/mysong.mp3
And there you have it – mp3 playing easily and clearly on the Pi Zero.
You can adjust the volume (audio gain) by using the -g flag with mpg321, giving it a value from 0 to 100:
mpg321 -g 70 ~/Music/mysong.mpg
Next steps for the amp
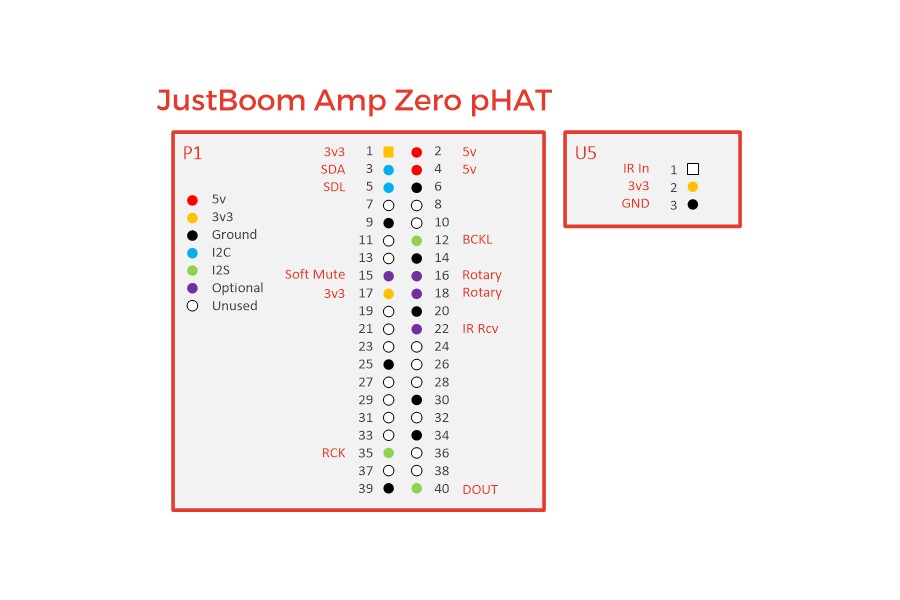
I would ideally like to have some kind of hardware control over the volume. So this may mean using a spare GPIO pin or two for a rotary controller (though interestingly the pin out for the amp shows optional rotary pins and a pin for soft mute), so something may be able to be done with that. I asked the JustBoom team about documentation for that and they replied:
There isn’t any documentation yet as this feature is either naively supported by the OS you are using or requires a script custom made. We are working on one as we speak but some distros are already supporting the feature e.g. MoodeAudio https://twitter.com/GarageTechTweet/status/804732053338066944
So that sounds very promising.
I also want to try out omxplayer to see if I will use that over mpg321. Of course, if the interface ends up being web-based then I’ll probably end up using the built-in browser players.
Step 2
Step two will be a brief overview of the screen… when I get around to writing it, that is!


2 Responses