Making a pewter and resin turtle
A little while ago I thought, “wouldn’t it be great to make something out of pewter? I want to play with resin, too. Maybe I can use them together?”
You know, the normal every day thoughts all of us developers have, right? Actually, I say that, but developers really are a creative bunch of people. So many of them that I know are artists, or makers, musicians. Maybe there’s just something about the art of coding that spills out into the rest of our lives.
Anyway, I digress. Pewter and resin.
I’d had no experience in using either, but since when have we let something like a complete lack of knowledge stop us doing anything? But given work and family life I put it on the back-burner. But the idea was always there when I got bored or wanted to make something but without the concrete plan of what exactly make.
A friend of mine has a stylised turtle logo he’d created and I thought would work great as the kind of thing I wanted to created; big bold lines and plenty of ‘shell’ space that I could fill with purple resin (the colour used in his logo). So that was it; idea formed. I’d make him a version of his logo with pewter and resin just for the poops and giggles of it.
Ebay was my friend in getting the parts. What I needed was:
- Some pewter
- Something to make a mould out of which could take the heat of the melted pewter
- Some epoxy resin
- Some colouring for the resin
Naturally I did extensive research for all the above items (ie, I did a search for ‘pewter’ and other such terms on ebay and bought what I could afford and seemed OK… I’m nothing if not scientific).
Making the mould
I needed a positive image with which to make my silicone mould. What I had at hand was wood. So I started to cut out a shape but it soon (very soon) dawned on me that I’d have no hope of making the shape good enough for the silicone.
I was scuppered!
But then it dawned on me that I knew people that had 3D printers! So I created a 3D image in TinkerCAD and got a mate to print out the image for me. It’s about 10mm x 80mm x 80mm, and even on its own it looks pretty nifty.
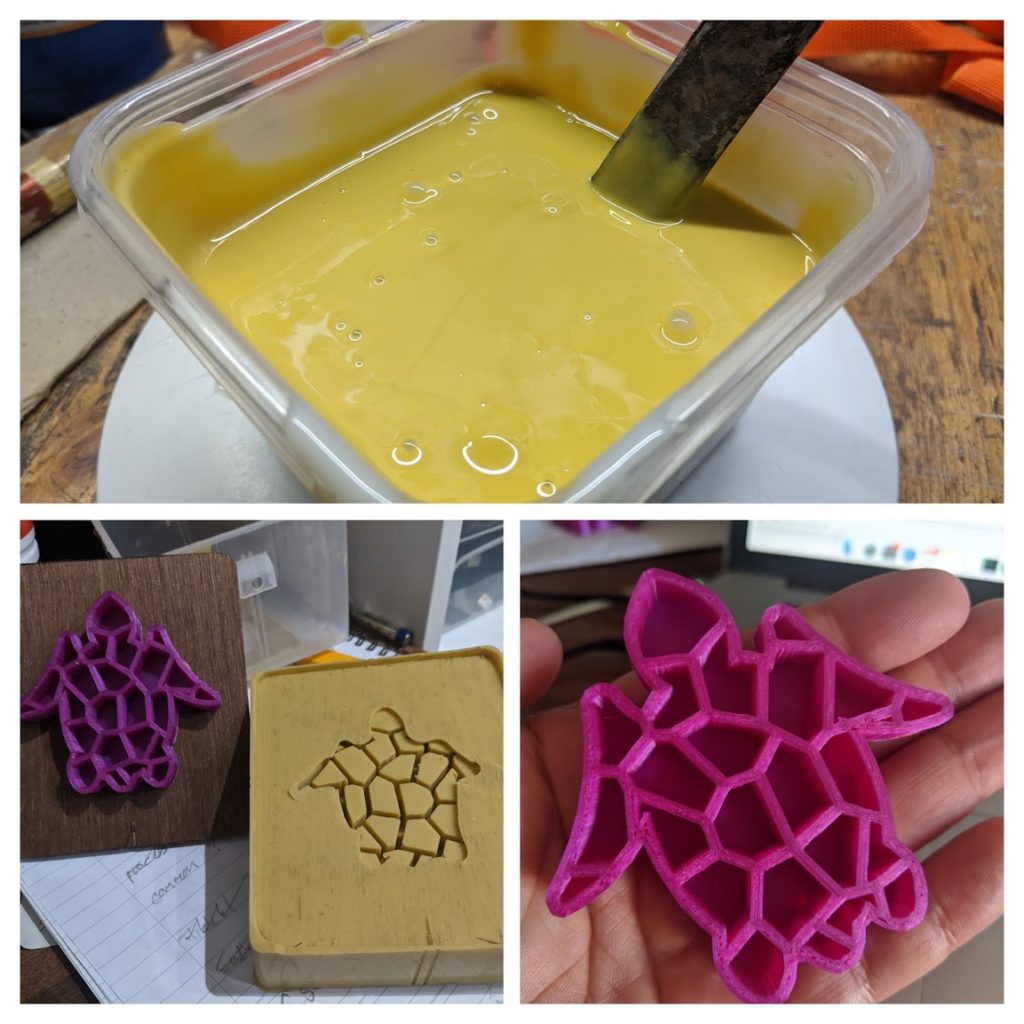
What were my main take aways from creating the mould?
- I have no concept of how much silicone I would need! I made a very large mould where I really didn’t need to. But I think the rigidity of it all in the long run was a good thing.
- I should have smoothed out the printed model first, perhaps with a dip in some acetone. The silicone was exceptionally good as picking up every minor detail, which the pewter also did. So cleaning up here at the very first step would have been much better,
Pouring the pewter
The fun part for me (which given my other posts about blacksmithing, should come as no surprise); heat up and melting metal!
All I used was an old saucepan on a camping stove. Pewter has a ridiculously low melting point (170–230 °C), so doesn’t take much time to reach a liquid state. From there, it was just a case of pouring on the mould.
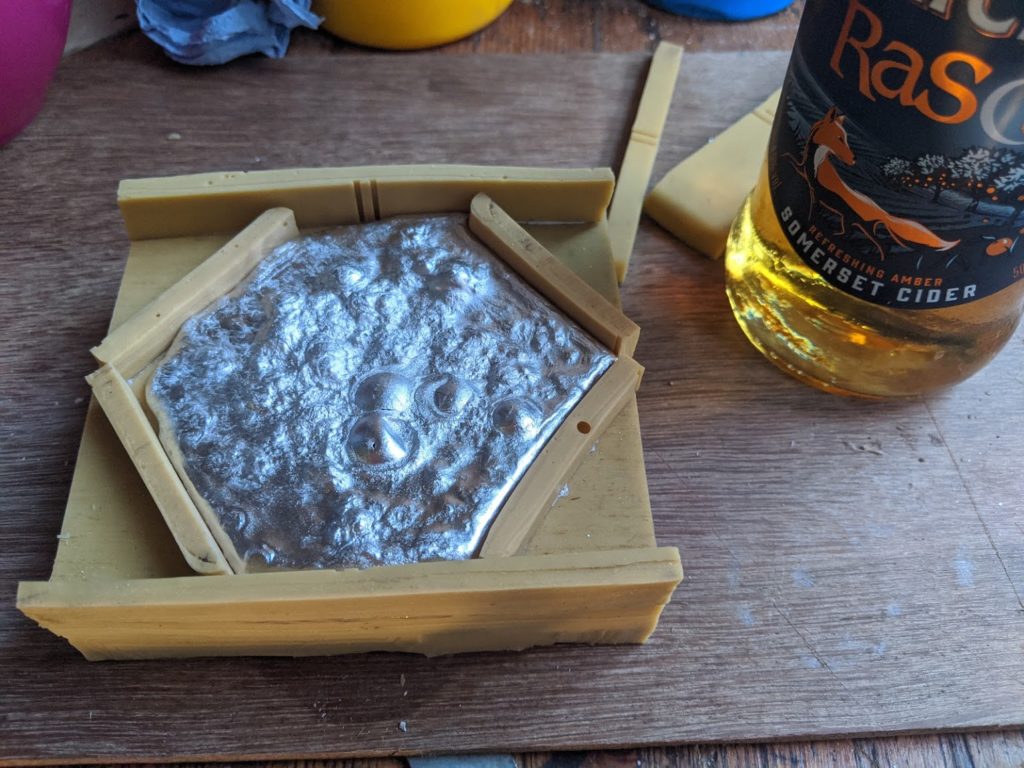
Drinking cider while pouring hot melt. What could possibly go wrong?
On a completely unrelated side note; don’t pour hot metal while wearing shorts and no shoes and whilst drinking cider. If some hot metal were to, oh, I don’t know, splash out and fall on your foot then it will burn you and take bloody ages to heal… Erm.. So I’m told.
As you can see from the image, the pewter was all bubbly and really didn’t come out very well. A little research online taught me that pouring directly on top of the mould like this doesn’t offer good results. However, if I cut a funnel in the mould and poured it in vertically the results would be better.
OK, not a problem. Pewter melts, right? Let’s melt it up again!
Now, trying it again with a vertical pour (with the mould duct-taped against a sturdy bit, because duct-tape it’s just awesome for everything), and the results were much better.
The metal solidifies pretty quickly, but I gave it about 15 or 20 minutes to cool down enough to handle so that I could open it up and get working on the clean-up.
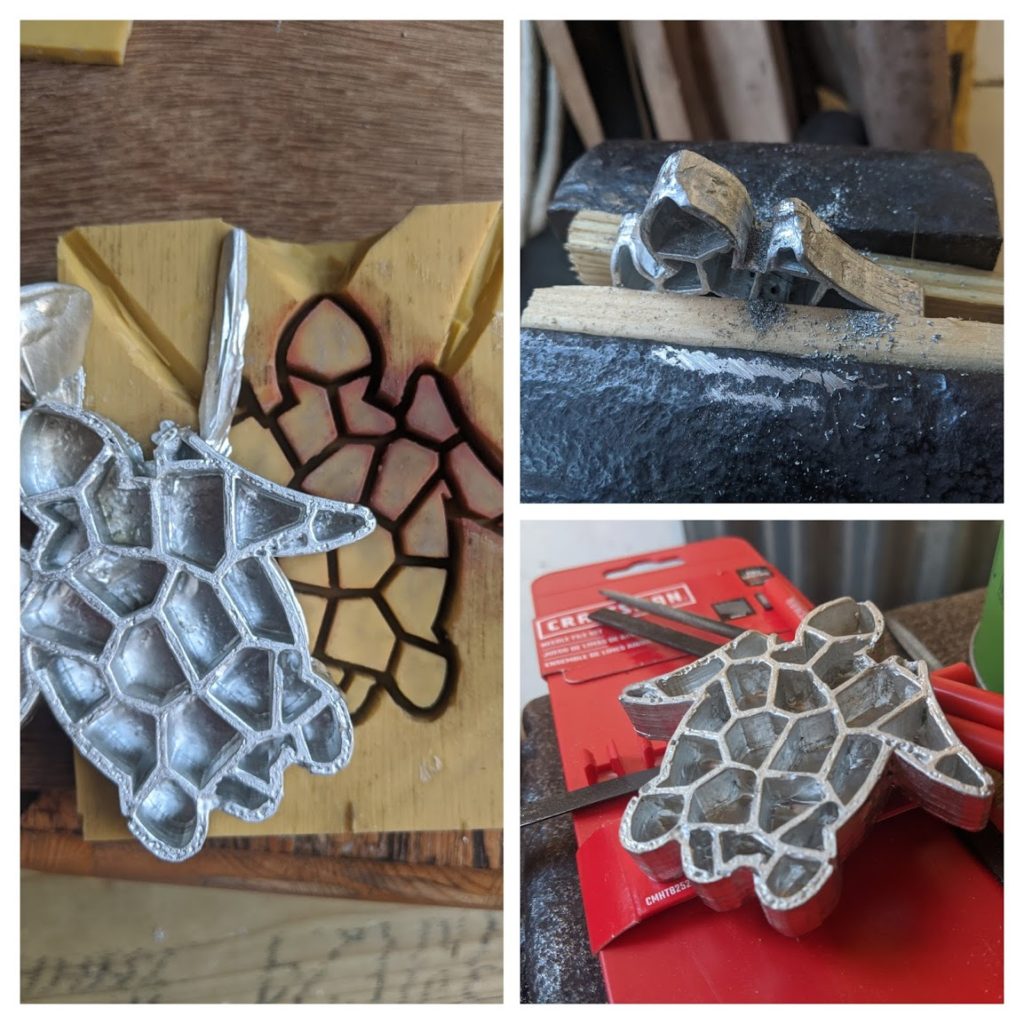
The take-aways here are:
- Starting with a good mould will mean far less sanding and filing. But if you have to do that then make sure you have a nice set of files
- Don’t spill hot metal on skin; the body really doesn’t approve
- Pour vertically because the results for some reason are much better
Pouring the resin
No two ways about this; I made a ruddy mess doing this bit!
My pewter casts were not the best, so one of them had a little hole I didn’t spot resin trickling out of until it was too late. Also some of the edges were not great so resin just kind of seeped over the walls.
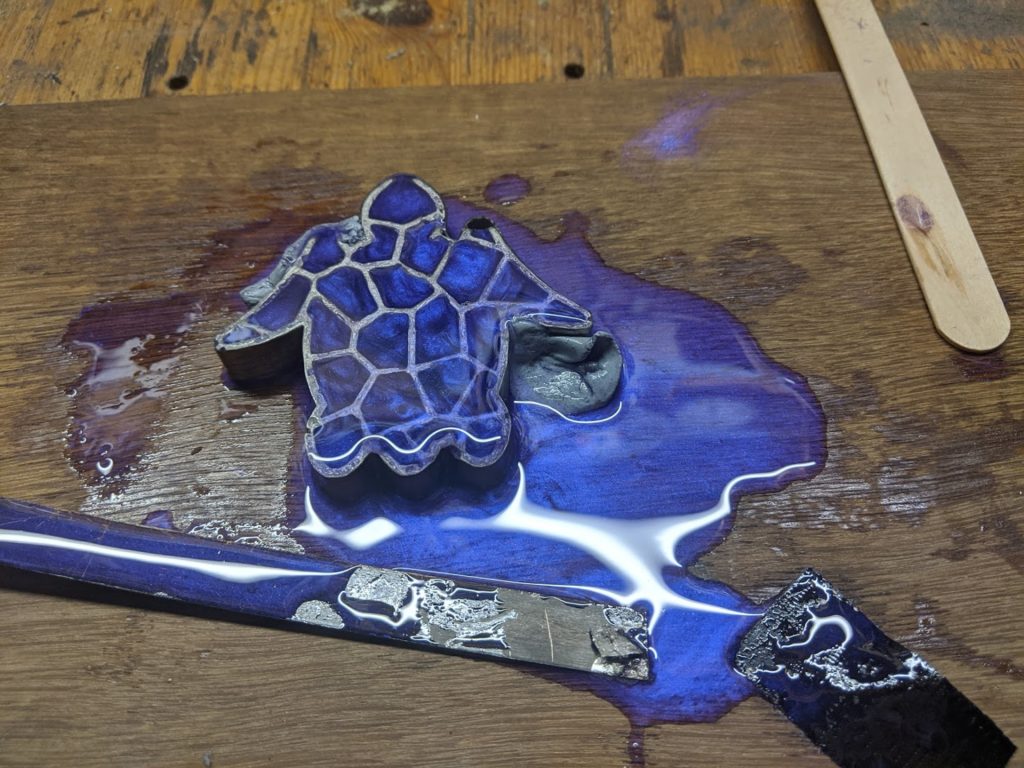
Once the resin has set, I realised what a very, very bad idea it was to do this on a scrap bit of marine ply! The resin stuck like anything.
I got a little smarter the next time round and did it on some grease-proof paper. Any spilled resin just peeled right off… Marvelous!
Once the resin set (I gave it a good 12 hours, at least), it was a case of sanding, sanding, sanding, sanding… oh, and a little bit of sanding on top of that. To be honest, though, I don’t think I did near enough sanding.
I used a small bench grinder with stitched mop for a little buff and polish, and that was pretty much that.
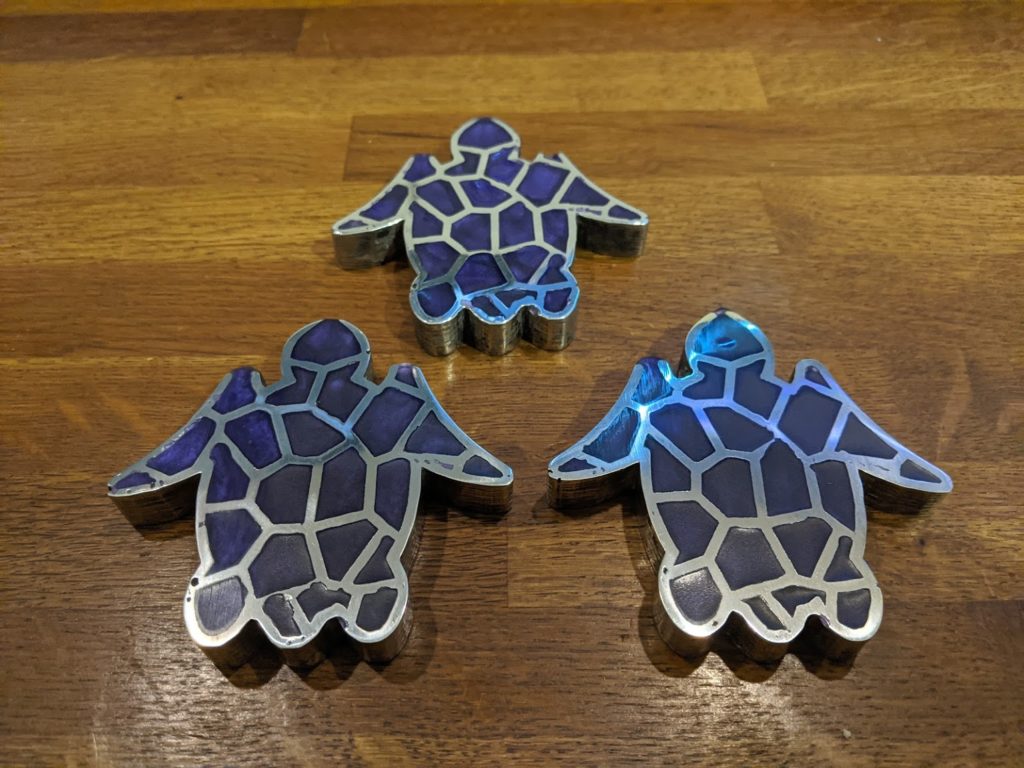
Why three?
Well, I only intended to make one for my friend. But, just like the silicone, I had no concept of how much pewter or resin it would take. Because of this I made/melted too much and didn’t want to waste them at all.
Definitely a fun project and something I will attempt to use again for other things.